
Understanding Laser Levels: Types and Uses
The Evolution from Traditional to Laser Levels
The shift from traditional levels to laser technology marks a significant advance in precision tools. Before laser levels, workers relied on bubble or spirit levels for balance and alignment. These manual tools were useful, but not as exact as lasers. As construction grew more complex, the need for more precise and easy-to-use tools became clear. Laser levels stepped in to meet this need. They offer clearer lines and points that are visible even in bright conditions. These tools have made tasks like installing ceilings or tiling floors more accurate. The evolution to laser levels has transformed how professionals and DIY enthusiasts approach their projects.

Differentiating Between Laser Level Types: Dot, Line, and Rotary
Laser levels come in various types, each suited for specific tasks. Dot lasers project a simple point on a surface. They're great for transferring points from one area to another. Line lasers produce a straight line along a surface. These are useful for tasks like hanging pictures. Rotary lasers emit a line that rotates 360 degrees. They're ideal for outdoor use, like laying foundations.
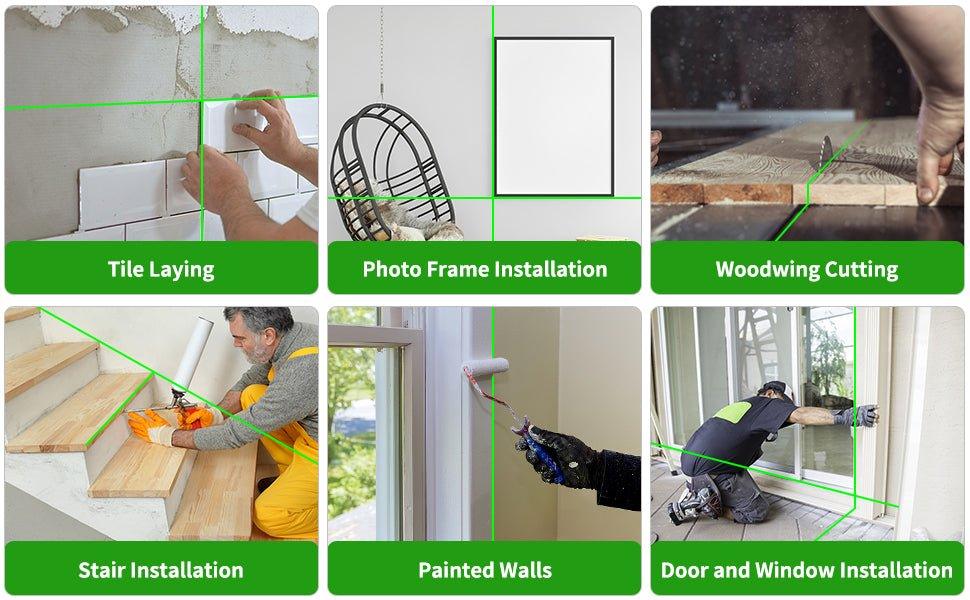
Common Applications of Laser Levels in Construction and DIY Projects
- Setting Foundations: By creating perfectly level lines, laser levels ensure the proper elevation for foundations. This helps prevent costly construction errors related to unlevel bases.
- Installing Ceilings: Laser levels assist in maintaining a flat plane for ceiling installation, enabling professionals and DIY enthusiasts to work more efficiently.
- Aligning Walls: They provide a clear, precise guide for erecting walls, which is critical for structural integrity and aesthetic alignment.
- Tile and Flooring Layouts: Laser levels are essential for ensuring straight and square tile layouts, which is key to a professional-looking finish.
- Wallpaper and Painting Projects: They make sure wallpaper lines are straight and paint patterns are accurate, enhancing the overall look of a room.
- Cabinet and Shelving Installation: Ensuring that shelves and cabinets are perfectly horizontal and vertically aligned, laser levels minimize mistakes and speed up the installation process.
- Landscaping: Outdoor projects like terracing or installing a deck also benefit from the precise lines provided by laser levels, ensuring symmetry and proper drainage.
Exploring 3D Laser Levels: Features and Advantages
Key Features That Define 3D Laser Levels
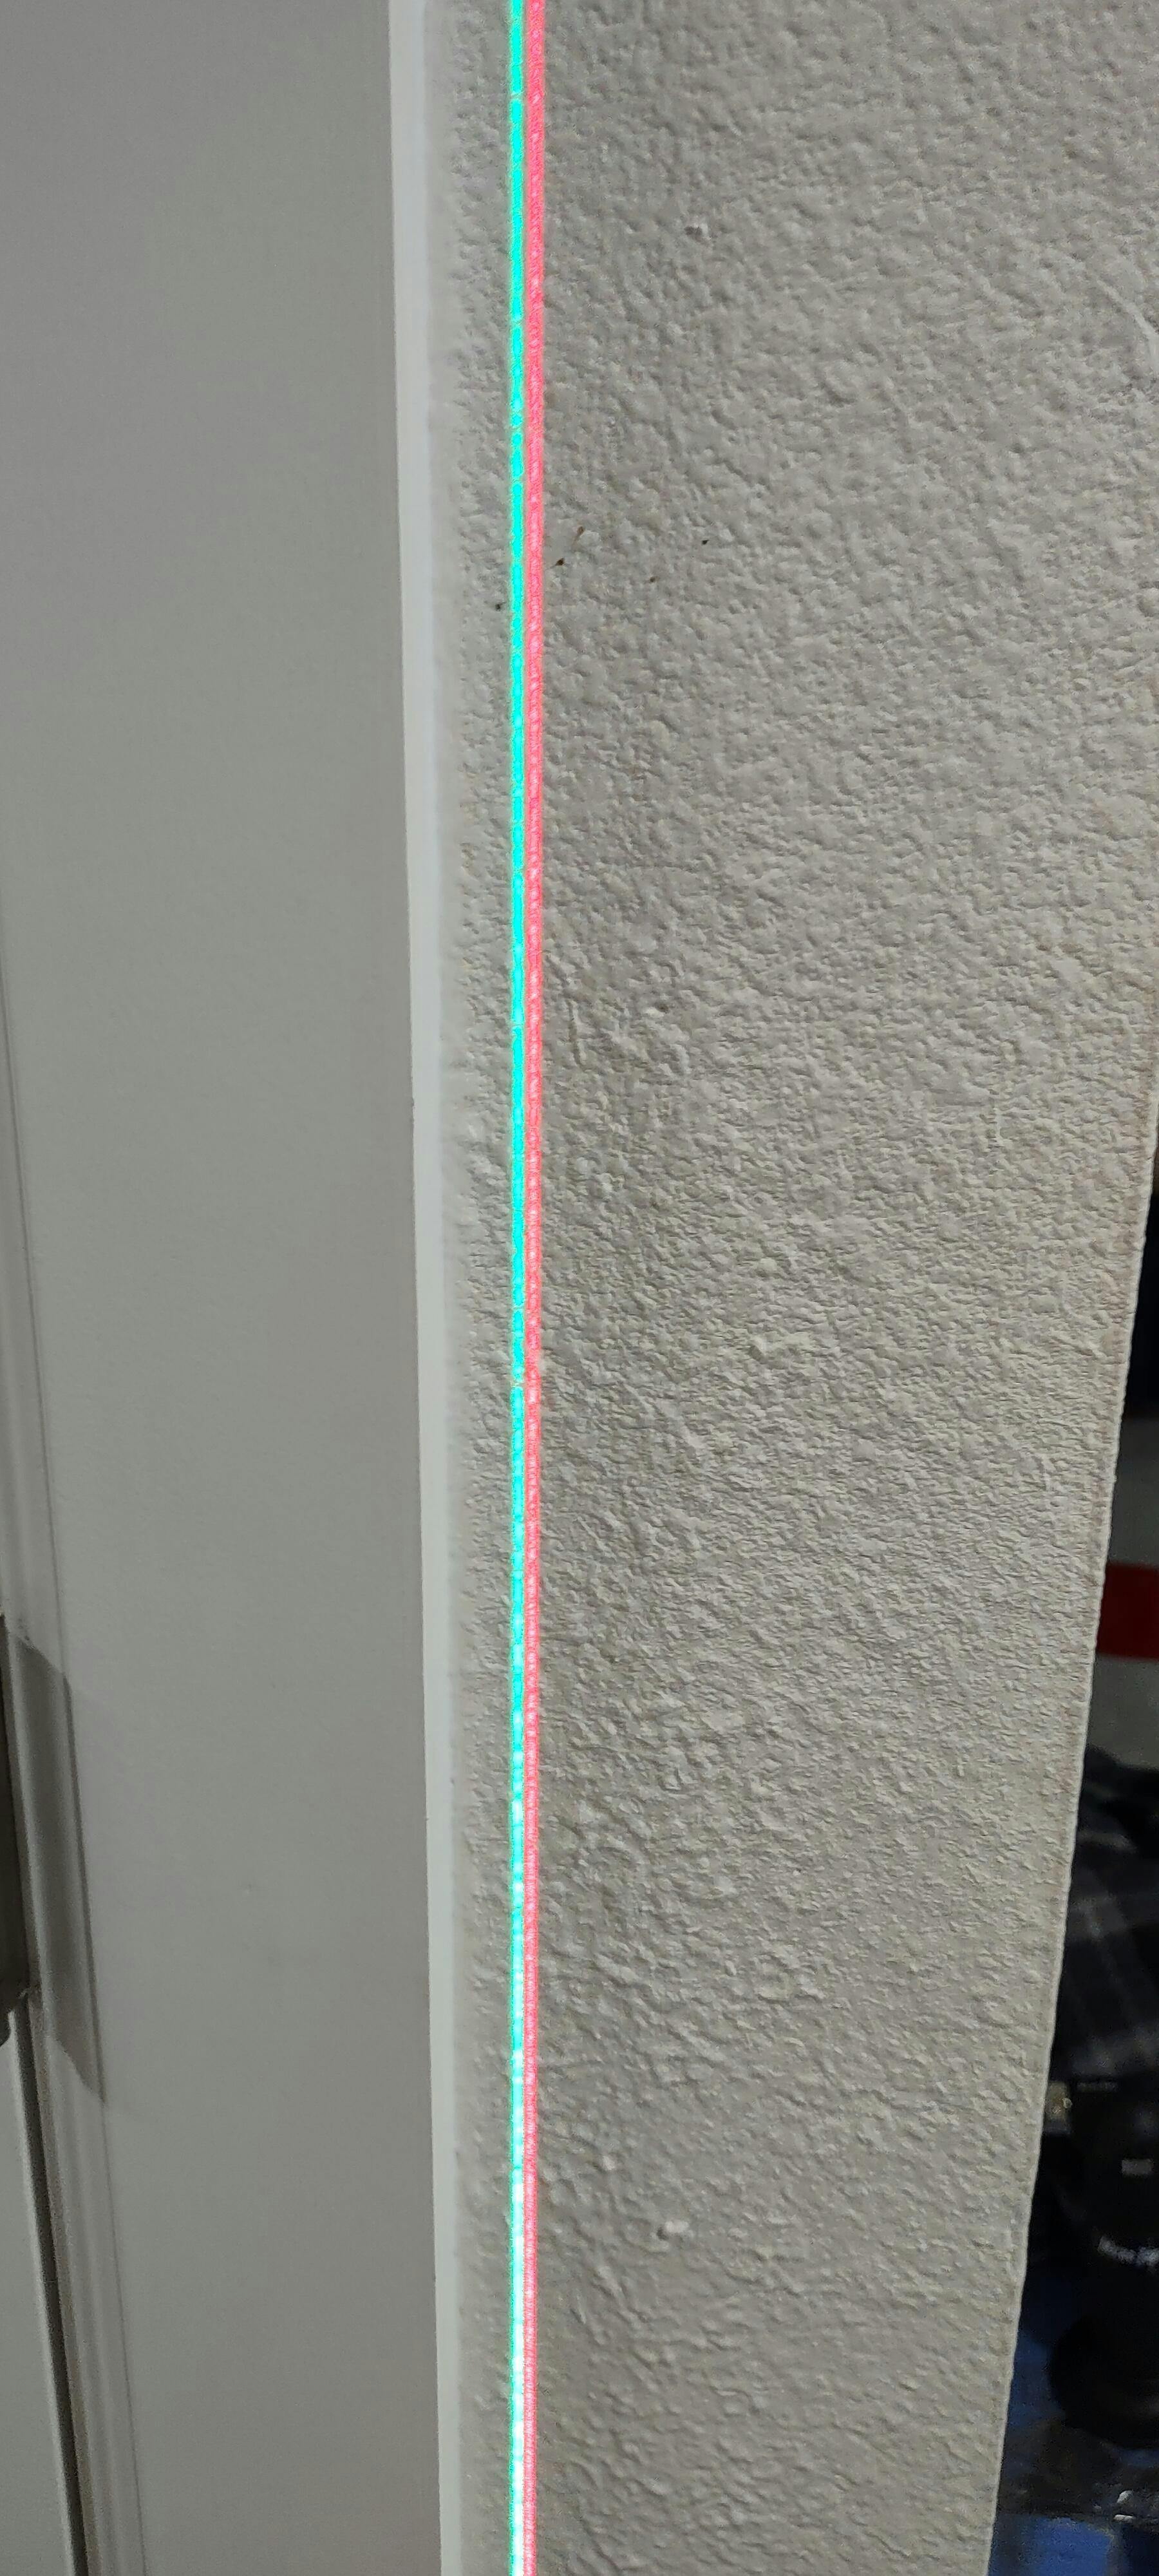
3d laser levels stand out with their unique features. They create 360-degree visible lines on all surfaces. This means walls, floors, and ceilings can be aligned at once. The Auto-Leveling feature keeps lines straight within certain degrees. Most models are equipped with a 'Lock' mode, which prevents internal components from damage during transport. Brightness is also key. Better models offer adjustable laser brightness for outdoor use. This ensures the laser lines remain visible even in bright conditions. Some even come with a receiver that detects laser lines in sunlight. USB charging is another convenience feature, making it easy to charge on-site. Lastly, magnetic brackets or wall mounts make the setup process quick and easy. These features make 3D laser levels vital for precise construction and home improvement jobs.
Advantages of Using 3D Laser Levels for Precision Alignment
3d laser levels offer many advantages for precision alignment. They project three planes of light: horizontal and two vertical at 90 degrees. This makes layout tasks faster and reduces errors. Users can align walls, floors, and ceilings at once without moving the tool. The levels give a clear guide for installing structures like tiles and cabinets. They work well indoors and outdoors, even in bright light. Many models have self-leveling features. This ensures accuracy even on uneven surfaces. 3D laser levels save time and increase quality in building projects.
Comparing 3D with Traditional and Cross Line Laser Levels
When considering laser levels, it's crucial to know how 3d laser levels stack up against traditional and cross line types. Unlike traditional levels that use manual methods, 3D laser levels project points in three planes, providing 360-degree coverage. This means you can establish a level line on all walls simultaneously. Cross line laser levels are a step up, creating cross lines on a surface for tasks like tiling or alignment of fixtures. However, they usually project on one or two planes. 3D laser levels, on the other hand, offer more comprehensive leveling, which is essential in complex jobs. They save time and prevent errors in layouts. To sum up, 3D laser levels are more versatile and time-efficient for full-room layout tasks compared to their traditional and cross line counterparts.
Choosing and Using 4D Laser Levels Effectively
When to Consider Upgrading to a 4D Laser Level
4D laser levels are top-of-the-line tools for complex projects. Consider upgrading when precision and multi-directional leveling are crucial. Ideal for tasks needing simultaneous horizontal and vertical alignment. Useful in detailed construction, cabinetry, and intricate layouts. Upgrade if you seek efficiency with a 360-degree laser plane for full-room coverage.
Step-by-Step Guide to Setting Up and Using a 4D Laser Level
Setting up and using a 4D laser level doesn't have to be complex. Here is a simplified guide:
- Placement: Position the laser level on a stable surface or tripod. Ensure it's secure.
- Power Up: Turn on the device. Some models self-level, wait for it to stabilize.
- Adjustments: If needed, manually level the device using the bubble indicator.
- Laser Projection: Choose the 4D mode to project lines in all directions.
- Alignment: Adjust the laser lines to match the marks or points you need.
- Lock: If your model has a lock, engage it to prevent movement.
- Work: Begin your project, using the bright lines as a guide.
Always refer to the manufacturer's manual for specific instructions. Safety first!
Tips for Maintaining Accuracy and Longevity in Laser Levels
- Store laser levels in a protective case to prevent damage.
- Avoid exposure to extreme temperatures and moisture to maintain accuracy.
- Clean the lenses with a soft, lint-free cloth to ensure clear laser emission.
- Replace batteries or recharge regularly to avoid power issues during use.
- Periodically recalibrate the equipment according to manufacturer's guidelines.
- Handle the device with care, avoiding drops or impacts that can misalign components.
- Keep the laser level away from magnetic fields which can interfere with its sensors.
- Following the manual’s instructions for use and storage is vital for longevity.
- Consider professional repairs for complex issues instead of DIY fixes.